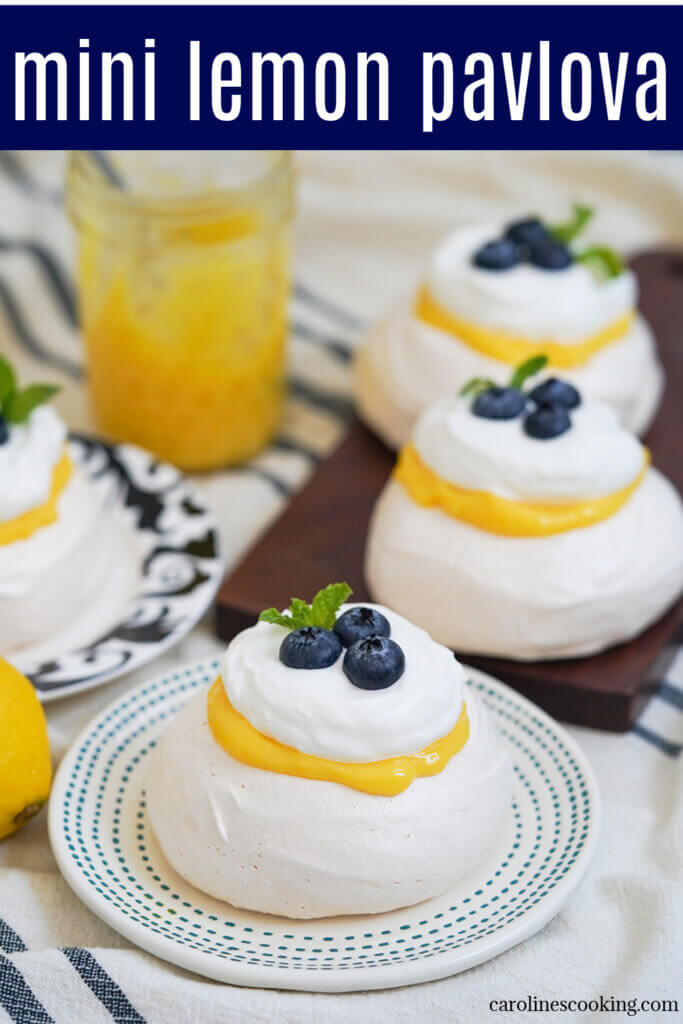
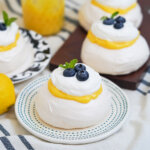
This mini lemon pavlova is a delicious combination of sweet, tart, crunchy and meltingly soft, all in one pretty individual serving. Easy to make, and largely prepared ahead, it's a dessert perfect to wow guests (or just because).

This post may contain affiliate links, where we earn from qualifying purchases. See more details in the policy page.
Pavlova has long been one of my favorite desserts as it was one my mum liked to make. I understand why, as it's easy, tasty and perfect for entertaining since you make it largely ahead of time. She'd often make it if we had guests coming over for dinner, or sometimes just because.
As well as being made ahead, it's also a dessert that is easy to change up with different toppings. While cream (or similar) is pretty much a given, you can use different fruits, or even add some shaved chocolate or candied nuts. I also love using lemon curd, as I have here.

What is pavlova?
Pavlova is a meringue-like dessert that's crisp on the outside and soft inside. It was created in honor of the ballerina Anna Pavlova when she toured Australia and New Zealand in the early 20th century. Though don't start a debate on which country invented it. It's hotly debated and the answer is lost to history.
While I think it's a fantastic dessert, my only challenge with pavlova, as a rule, it they are typically big. Great for entertaining, yes, but not so great for everyday if you're a smaller group. Unless, of course, you eat it over a few days. Or have lots. No judgement either way.
True, I do tend to make a smaller-sized pavlova for us, like the pavlova with raspberries I shared before. But I also love the idea of individual pavlovas. They are so easy to scale to your needs, and easier to serve than cutting from a large pavlova. Plus, these delicate little mounds are even prettier than a slice, too.

What's the difference between pavlova and meringue?
Both pavlova and meringue share the same base ingredients of egg white and sugar, and you make them in much the same way. You beat the egg whites then incorporate the sugar to get an airy, glossy mixture. There are two main differences: the additional ingredients and cooking.
With meringue, you might add a little cream of tartar to hep stabilize the mixture, and vanilla or other flavors. Pavlova, meanwhile, might use cream of tartar but more typically uses vinegar to stabilize and strengthen the shape. Then in addition, you add corn starch (corn flour in UK) which helps to create that cloud-like, marshmallow-y filling.
The other, and probably more important thing, that sets them apart is the cooking. Meringues are cooked at a low temperature for a long time until completely dried out. Pavlova, meanwhile is cooked at a still low but slightly higher temperature and for less time. You cook until they are dry and crisp on the outside, but still soft inside, giving a wonderful mixture of both in each bite.

A true mini pavlova v meringue nests
Many mini pavlova recipes I have seen are actually meringue nests. Yes, they look pretty, but they're not really pavlova as they are completely dry, or at least close to it. It's true, the smaller size is a little trickier to get quite the same balance of textures, but it is possible!
The trick is to stop cooking early enough, and also don't make the shape too shallow. Yes, you want to create a slight indent to help toppings stay on easier, but don't make a thin base with a rim. I find in many ways it's easier to scoop the mixture rather than pipe it. Yes, you do need to do a little shaping, and it may not be quite as neat, but I think you more easily avoid the base being too thin.
Make ahead tips
As I say, this is a great dessert for making ahead, and in actual fact you are need to make it at least a few hours before, if not a day or two. This gives it time to cool gradually and be less likely to crack. Though don't worry if it does, it will still taste great and you may manage to hide the cracks with cream. Once cool, store pavlova at room temperature.

For this version, you can also prepare other components ahead. You can make lemon curd a few days ahead (or buy it, though homemade is easy and generally tastes better), and cream can be whipped ahead, particularly if stabilized. Both should be stored in the fridge.
I'd highly recommend making extra lemon curd as it's delicious on toast, too, but you can also then make my super easy lemon mousse.
Final tips for making pavlova
This does come together easily, but a couple tips to help it comes out well:
- Use a really clean bowl to beat the eggs in - don't use plastic as it tends to hold fat.
- Let the egg whites come to room temperature as they will beat better.
- Add the sugar to the beaten egg white gradually, one spoonful at a time, and mix in each time.
- Test the egg-sugar mixture by rubbing a little between you fingers - if it feels grainy, the sugar isn't completely dissolved, so mix a little more (if not fully dissolved, it's more likely to "weep").
- Only mix a little more after adding the vinegar and corn starch.
- Don't open the oven during cooking until right near the end of cooking time - only test if it's dry within a few minutes of the cooking time.
- Make sure you let the pavlova cool gradually in the oven at least an hour after you turn the oven off.
- Don't decorate until right before serving to keep the outside as crisp as possible.
If you have leftover decorated pavlova, you can store it in the fridge for up to a day or two. It will gradually become softer and the outside may start to weep a little. But it will still be really tasty! As my kids say, when you cut into it, as above, it looks like it's smiling at you - and for a reason 🙂

This mini lemon pavlova is a wonderfully tasty dessert, in the perfect individual serving. It's crisp outside, marshmallow-soft inside, and the tart lemon curd and smooth cream pair perfectly with the sweet base. Perfect for entertaining, or any excuse you want to find.
Try these other make ahead desserts:
- Strawberry mousse
- Chocolate panna cotta
- Raspberry fool
- Plus get more dessert recipes and Australian recipes (+New Zealand!) in the archives.
Mini lemon pavlova
Ingredients
- 2 egg whites large
- ½ cup granulated sugar or caster sugar/fine sugar
- 1 teaspoon cornstarch cornflour
- ½ teaspoon white wine vinegar (or red wine/rice vinegar if not available)
To top
- ½ cup heavy cream double or whipping cream
- ½ cup lemon curd see notes
- 12 blueberries or other fruit - see instructions
Instructions
- Preheat the oven to 250F/120C and line a baking sheet/tray with parchment paper.
- Whisk the egg whites in a clean bowl at medium speed until they form medium-stiff peaks. You want them to hold their form fairly well, but don't over-beat.
- Gradually add the sugar 1a spoonful at a time, beating in after each addition, until it is all added and the mixture is glossy. Make sure it is well mixed in and test by rubbing a small amount between two fingers - if it feels gritty, the sugar is not all dissolved so mix a bit longer.
- Add the cornstarch and vinegar, and whisk in to combine. If needed, dot a small amount under the corners of the parchment paper to hold it in place. Then form four even mounds on the parchment. Smooth each of them out to be a relatively even circular shape, still relatively high, then form a slight indent in the middle of each.
- Bake in the preheated oven, in the middle of the oven, for approximately 40-50 minutes until it they are dry to touch and just starting to color slightly. It will seem crisp when touched (although be gentle so you don't break it). Turn off the oven and leave the pavlovas inside with the door closed for a further 1 hour or more. This will help avoid them weeping and cracking (though a little cracking is fine, you will cover a lot when you top them)
- Shortly before serving, whip the cream until it forms medium-firm peaks.
- Top each pavlova with some lemon curd, cream and optionally some fruit to decorate on top - blueberries, as I have used here, work well, but raspberries or strawberry would also be good. You could also top with a few candied nuts eg almonds.
Video
Notes
Nutrition
See some of my favorite cooking tools and ingredients in the Caroline's Cooking Amazon store.
Remember to pin for later!

Leave a Reply