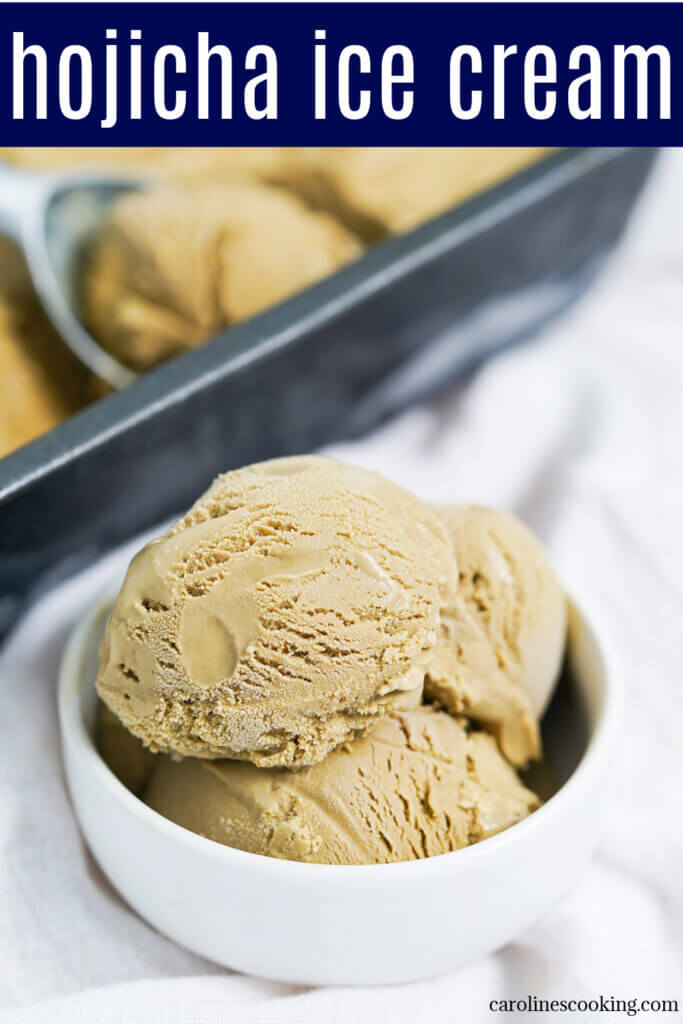
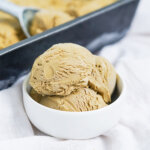
Hojicha powder gives a wonderful depth of flavor to this hojicha ice cream - think matcha with toasty undertones. It's creamy and delicious, plus easy to make. Well worth finding any excuse to enjoy.

This post may contain affiliate links, where we earn from qualifying purchases. See more details in the policy page.
Many ice creams and sorbets that we make are either old favorites or inspired by ones we have tried. Sometimes that's at local ice cream stores, other times further afield. This one is inspired by a tiny, but incredibly good, tea and ice cream store that we discovered by accident near out hotel in Kyoto.
The store had seven grades of matcha ice cream, depending on how strong you liked it. The strongest one you were only allowed one scoop at a time, it was that intense. I think over the few days we were there we tried most of the matcha versions, as well as some of their other flavors. Since going back may not happen any time soon, the next best thing was to try to recreate some at home, like this tasty scoop.

What is hojicha?
Hojicha is green tea but it is prepared quite differently from other types of tea. The leaves are roasted over charcoal, giving them a distinct red-brown color. The roasting also gives the tea a slightly toasty flavor that's that bit more complex.
As well as changing the flavor, the roasting process also reduces the caffeine, making hojicha a popular choice later in the day. You can buy hojicha as loose leaf tea, in tea bags as well as in powder form. While all can make a great cup of warm or cold tea, the powder in particular is ideally suited to use on other ways.
Hojicha powder can add a lovely depth of flavor to baked goods, with slight caramel and nutty notes. I hope to experiment with it more so watch this space! In the meantime, though, it makes a truly delicious ice cream that I highly recommend trying.

The ice cream base
The ice cream base here is what you might describe as a custard base as it's a mixture of heavy cream (double cream), milk, egg yolks and sugar. This is different from no churn ice creams (like my roasted strawberry ice cream). They use a mixture of whipped cream and sweetened condensed milk to get to a similar end texture without churning.
Different styles of ice cream use different proportions of milk and cream, and also different numbers of egg yolks. Or none, as with sherbets and many frozen yogurts.
In this ice cream recipe, I have gone on the lower end yolks-wise, adding one egg per cup of dairy. To me, it's enough to help give a relatively rich texture, but not so many so that they mask all the lovely flavor.

Adding the hojicha flavor
As mentioned above, the easiest way to add the flavor is using hojicha powder. You simply blend the powder into the liquid base. If you can't find hojicha powder, you can instead use tea bags (or loose leaf tea) but you would need to take an extra step and infuse the milk first - I'd suggest using my chai ice cream recipe as reference for this.
With the powder, you don't have that extra infusion step, but I would note a couple things. First, it's worth sifting the powder first as it can easily clump - this helps it blend more easily with hopefully less lumps.
Secondly, hojicha can lose flavor if it gets too hot. While you likely won't get the base to a temperature that might be a problem, I still prefer to err on the side of caution and blend the hojicha powder with a little cold milk, then add this in at the end. It's not much of an extra step and to me feels worth it.

Steps to make hojicha ice cream
This comes together much like most other custard-based ice creams:
- Sift hojicha powder then blend with a little milk. You want to try to avoid lumps.
- Warm the cream base. Heat the rest of the milk and the cream until relatively warm - it's fine to steam and form bubbles around the edges but not boiling.
- Prepare the yolks. Separately, whisk together the yolks and the additional sugar so they become glossy.
- Temper the yolks. This basically means gradually increasing the temperature of the yolks so they warm gradually rather than cook. By whisking in a little of the hot cream at a time, you bring the temperature of the yolks up slowly.
- Warm the custard base to thicken. After adding the warm cream mixture to the egg a few times, add the yolk mixture back in the pot and place back over the heat, but on a low heat. Warm it, stirring pretty constantly, for a few minutes until it thickens a little. Since there are less yolks in this than some styles, it won't go that thick, but you should notice a difference. Make sure that it does not boil.
- Let cool a minute then add hojicha mixture and vanilla. Stir to mix through well.
- Strain to remove solids. Hopefully, you shouldn't have any, but just in case. It can also help you blend in any stubborn bits of hojicha that won't quite combine.
- Cool completely. You need the mixture to be very cold to make sure it churns properly. Let it cool briefly at room temperature first before then refrigerating. You may want to leave it in the fridge overnight.
- Churning then freeze. Churning gets you to roughly soft serve consistency, so it will need a little longer in the freezer. Don't be tempted to churn much longer as it can become overly firm.
It might feel like a few steps, but it really is easier than it might sound at first. Plus, despite it needing some waiting, the result is well worth it. According to all my family members it's just like they remember in Japan, so I'll take that as a win!

This hojicha ice cream has a fantastic flavor to it and a wonderful creamy texture. It's sufficiently bold without being overpowering. Truly a delicious scoopful you'll want to find an excuse to make again and again.
Try these other tasty scoops:
- Raspberry sorbet (packed with fantastic fruit flavor)
- Ginger ice cream (smooth, creamy with ginger both in the ice cream base and little pieces of crystalized ginger mixed through)
- Cherry ice cream (a no churn ice cream with delicious cherry flavor)
- Plus get more dessert recipes in the archives.
Hojicha ice cream
Ingredients
- 2 tablespoon hojicha powder
- 1 cup milk whole/full fat milk
- 1 cups heavy cream double cream
- 2 egg yolks
- ½ cup sugar
- ½ teaspoon vanilla extract
Instructions
- Sift the hojicha powder through a fine strainer into a small bowl. Add a small amount of the milk and blend with a whisk (or matcha brush, if you have one) until smooth and no lumps remain. If it's too paste-like, add a little more milk.
- Place the cream and remaining milk in a pot/pan and warm over a medium-low heat until it reaches scalding point - starting to steam a little, and a few bubbles on the edges but not yet simmering.
- Meanwhile, whisk together the egg yolks and sugar in a small-medium bowl until well combined and slightly glossy. Becoming glassy is a sign the sugar has dissolved.
- Carefully add a small amount (around a tablespoon or two) of the warm cream-milk mixture to the yolk mixture and whisk as you add so it combines without cooking the egg. Once mixed, add a little more, mix then repeat.
- After you have added the warm milk around three or four times, pour the eggy mixture in to the main pot/pan and place back on the stove over a low heat. Warm the mixture, stirring constantly, so that it thickens up a little. Take care - DO NOT BOIL. It should warm to around 170F/76C. It should become noticeably a bit thicker but not really thick. Remove from the heat and allow to cool for a couple minutes.
- Once it has cooled a couple minutes, add the hojicha mixture and vanilla extract to the custard base and mix in well. At this point, I recommend straining just to make sure you don't have any lumps in there, but you can skip if you like. Let the mixture cool a minute or two more then once cool enough, cover and place in the fridge to chill at least a few hours but ideally overnight.
- Once chilled, follow your ice cream maker's instructions to churn the mixture to a soft serve consistency, around 20 minutes. Once soft-serve texture, transfer to a container and place in freezer for a few hours to firm up before serving.
Nutrition
See some of my favorite cooking tools and ingredients in the Caroline's Cooking Amazon store.
Remember to pin for later!

Leave a Reply